Tempering Chocolate
Tempering chocolate is a special way of melting and cooling chocolate so it ends up shiny, snappy, and smooth—just like the kind you see on fancy chocolate bars or truffles. It also helps the chocolate set properly and not melt all over your hands.
Why Do We Temper Chocolate?
If you’ve ever melted chocolate and it turned out dull, streaky, or soft, that’s because it wasn’t tempered. Tempering gives chocolate:
A glossy finish – It looks polished and pretty.
A satisfying snap – Break it, and you’ll hear that crisp crack.
Stability – It won’t melt as easily or get those weird white streaks (called “bloom”).
What’s Happening Inside the Chocolate?
Chocolate has cocoa butter in it, and cocoa butter likes to form crystals when it cools. But not all crystals are created equal—only one type, called Beta crystals, gives you that perfect tempered look and feel. Tempering makes sure those Beta crystals take charge while keeping the other types of crystals out of the way.
How to Temper Chocolate – The Easy Steps
1. Chop It Up
Grab your chocolate (the better the quality, the better the results!) and chop it into small, even pieces. This helps it melt evenly.
2. Melt the Chocolate
You can melt chocolate gently in:
A double boiler (a bowl over a pot of simmering water).
Or in short bursts in the microwave (stir every 15–20 seconds).
Important: Melt the chocolate to its “melting point,” which depends on the type:
Dark chocolate: 115–120°F (46–49°C)
Milk/White chocolate: 105°F (40°C)
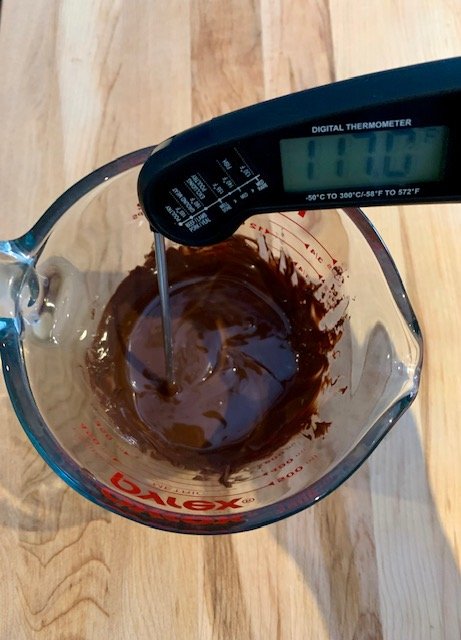
Melting dark chocolate to reach between 115-120 F. This did not take long in the microwave!
3. Cool the Chocolate
Now, we need to cool the chocolate down to encourage those Beta crystals to form. Here’s the trick:
Add a handful of chopped unmelted chocolate into your melted chocolate and stir it in. This is called seeding—it “teaches” the chocolate how to form the right crystals.
You will need to stir awhile. For one cup of chocolate, it took me about 15 minutes for it to cool to the right temperature. Be patient!
Keep stirring until the temperature drops to:
Dark chocolate: 82–84°F (28–29°C)
Milk chocolate: 80–82°F (27–28°C)
White chocolate: 79–81°F (26–27°C)
Cooling the chocolate takes awhile! Just keep stirring.
4. Warm It Back Up (Just a Bit)
Now we bring the chocolate back up slightly so it’s at the perfect working temperature:
Dark chocolate: 88–90°F (31–32°C)
Milk chocolate: 86–88°F (30–31°C)
White chocolate: 84–86°F (29–30°C)
Be gentle here—don’t overheat it, or you’ll lose all that hard work! If you are using the microwave, heat in 7 second increments. It will heat up very quickly!
5. Test Your Temper
Spread a small blob of your chocolate on a piece of parchment paper or a spatula and let it sit for a few minutes. If it’s tempered correctly, it will:
Set quickly.
Look shiny.
Snap when you break it.
If it’s dull or soft, don’t worry—just try again!
Tools to Help You
Double boiler or microwave - A double boiler is easier to control the temperature, however, you do need to worry about the water getting into the chocolate. Both methods have their challenges, so try both! I like using the microwave personally.
Spatula - Stir to your heart’s content.
Thermometer - I use this digital one, but infrared thermometers also work wonderfully.
Silicone molds - Once you get the hang of tempering chocolate, you are now ready to work with molds! There are so many out there, but I love these ones because you get a wide variety of shapes to play with.
A Few Tips
Use good quality chocolate: If your chocolate has a lot of additives and stabilizers, it may not turn out like you had hoped. Try to get baking chocolate or a quality chocolate bar that you enjoy the flavour of.
Water is the enemy! Even one drop can make your chocolate seize (turn grainy). There is no way to salvage this, so keep everything dry and be especially careful if using the double boiler method.
Use a thermometer: Chocolate is picky, so temperature is everything. Sorry.
Be patient: Tom Petty said it best - the waiting is the hardest part.
Practice makes perfect: The more you do it, the better you’ll get.
And that’s it! Once you’ve tempered your chocolate, you can use it to dip strawberries, make chocolate bars, or create beautiful decorations. If you’d like to make chocolate dipped marshmallows, here is the recipe for homemade marshmallows.
It’s a little bit of work, but the results are worth it!
Hey, I’m Kim!
After a lot of practice (and a few sticky disasters), I’ve crafted a delicious selection of lollies and mastered a ton of candy making tips to share with you—lump free. (You’re welcome.)


